Below, we'll walk you through the steps to demonstrate how to use BoxCryptor to store sensitive data using an iPad, and then access it via another device, like a windows computer. In this example, we'll be storing a picture in a BoxCryptor encrypted folder using PSMail's Cabinet service.
Step 1: Seach for "BoxCryptor Classic" in the AppStore and install the application.

Step 2: Open BoxCryptor Classic and tap Choose Cloud Provider.
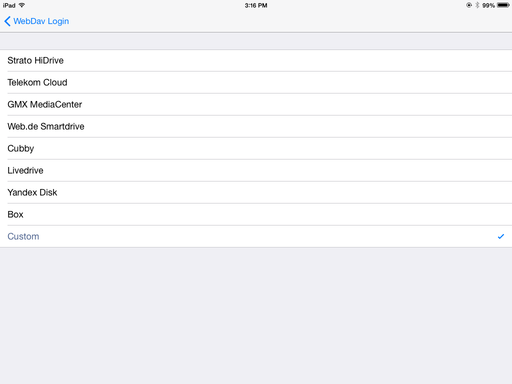
Step 3: Choose the WebDav provider.

Step 4: Choose Custom. (NOTE: Later versions of BoxCryptor may have PSMail Cabinet as an option. If so, go ahead and click this rather than custom.)
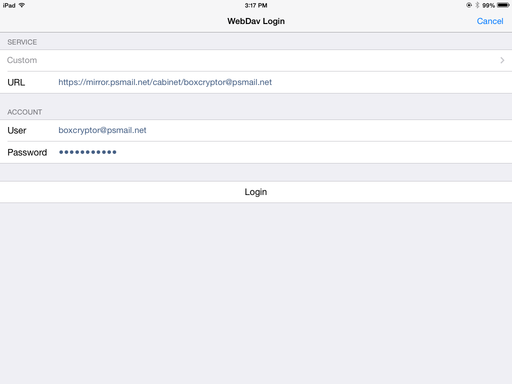
Step 5: Now, enter "https://mirror.psmail.net/cabinet/username@psmail.net" as the URL, substituting your primary PSMail address for "username@psmail.net". Similarly, type your primary address (i.e. "username@psmail.net") in the User field and your PSMail password in the Password field. Then tap Login.
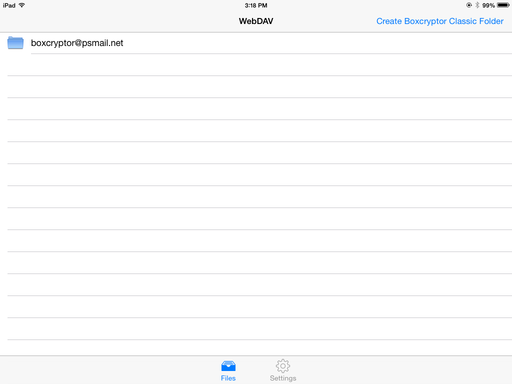
Step 6: Once you've logged in you will see the screen below. Now tap on Create BoxCryptor Classic Folder (this will be your encrypted folder).
The folder can be called anything you like. For convenience we have called it "encrypted" here. Create a password and confirm it. This password is very important for you to remember! It is like a FileVault or BitLocker password on your local PC. If you loose it, the content inside this folder will be LOST. Once you've created a name and passwod, tap Done.

Step 7: Boxcryptor will now give you further instructions about how to add files and content to this folder.
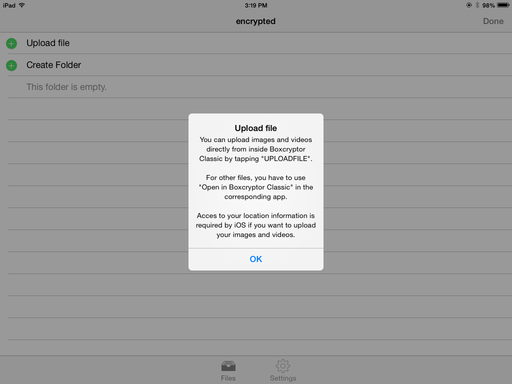
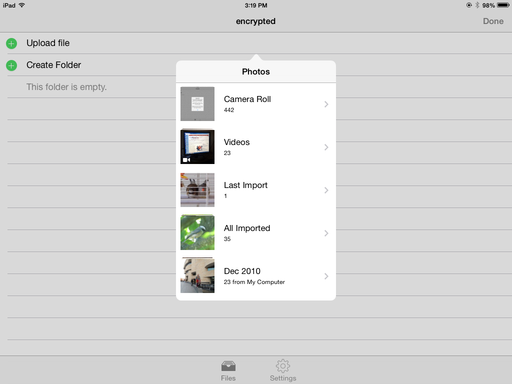
You can now upload sensitive files from your iPad or other device, including pictures, videos, etc.
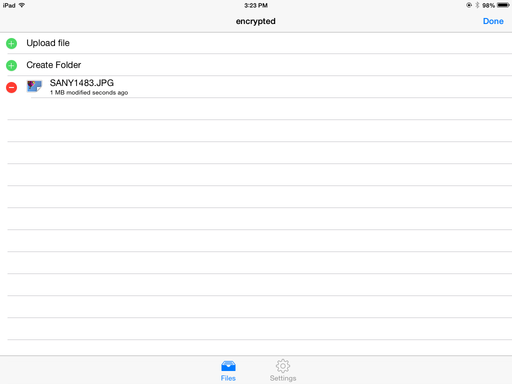
Step 8: Once BoxCryptor has completed an upload, you will see your new file in the "encrypted" repository.
Files in Boxcryptor can be accessed via other devices (computers, laptops, smartphones, tablets) using the same application. Below is the picture I just saved from my iPad accessed and viewed on a windows computer.

US players choose enjoying in} on the go, so casinos with a good real money roulette app are all the time ranked higher in our articles. All top on-line roulette casinos in the US provide some type of cellular gambling. Some {invest in|spend money on|put money into} native iOS apps, while others optimize their websites to be mobile-friendly. In addition to the basic European, French and American on-line casino roulette variations, there 벳익스플로어 are a variety of more unique games available from the world’s top software developers. These embody low stakes roulette, varied jackpot games and variations of the sport that improve or decrease the variety of pockets on the wheel.
ReplyDelete